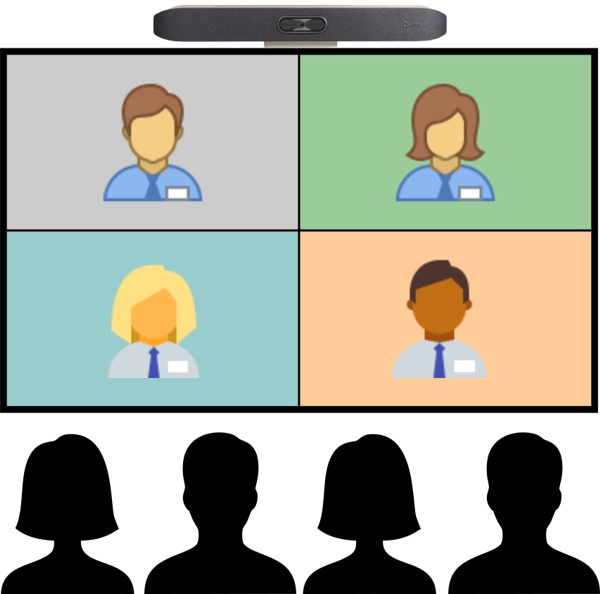
Synopsis
- Web conferencing cart (WCC) is used only to facilitate attending a meeting and allow discussion with remote attendees
- Participants on premise will not attend the meeting using their own device
- Participants on premise will not be sharing content
Set Up
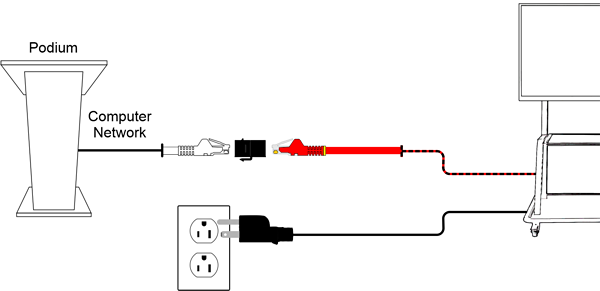
Cable Connections
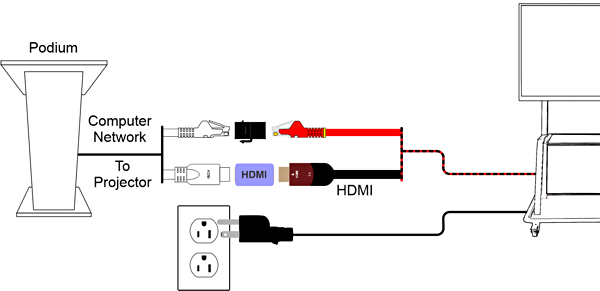
Alternate cable connections when projector is needed
To accommodate a larger audience the room projector may be added to the basic setup. Do so when indicated below.
Connections to the WCC
- Plug the cart into a power outlet
- Connect the red Ethernet cable from the cart to an active network jack in the department via a coupler
Turn on the Equipment
- Turn on the WCC as instructed on the cart
- Wait for the display and the Zoom Room controller to power up (2 minutes to boot and pair, then 37 seconds to synchronize with time server)
- If the display is not showing the Zoom Room welcome screen ensure that the display input is set to HDMI1
- If using a projector (the alternate cable connections option), connect the the HDMI cable
Joining a Zoom Meeting
- Remove the lens cover from the collaboration bar on top of the display
- Join the cart to the Zoom meeting from the Zoom Room controller
- Configure the meeting experience from the Zoom Room controller
After the Meeting
- Place the lens cover back on the collaboration bar
- Turn off the WCC as instructed on the cart
- Disconnect all the cables previously connected
Annotating During the Meeting
When the presenter shares their screen attendees on premise may add annotations to the shared content.
Troubleshooting
Having issues? See the troubleshooting page.
Graphics Attribution
Various icons on this page were sourced from Icons8.