Notes:
- The Web conferencing cart will be referred to as the WCC
- The presenter's computer will be referred to as a BYOD
- Mirroring on the projector is not officially supported in this mode.
Synopsis
- A small group of people in a room wish to use the hardware in the collaboration bar in a non-Zoom meeting
- The camera, microphone an speaker in the collaboration bar appear as individual devices to the BYOD
- The touch functionality of the tactile display is not needed
Comments
The passthrough mode suffers from latencies, which may be objectionable.
Prerequisites
- The BYOD must have an HDMI port
- The BYOD must have a USB 3 port (USB 3.1 supported)
- (Recommended) The BYOD should be equipped with an Ethernet connection
Set Up
Please connect the HDMI and USB cables to the BYOD only when instructed.
Connections to the WCC
- Plug the cart into a power outlet
- Connect the red Ethernet cable from the cart to an active network jack in the department via a coupler
Connections to BYOD
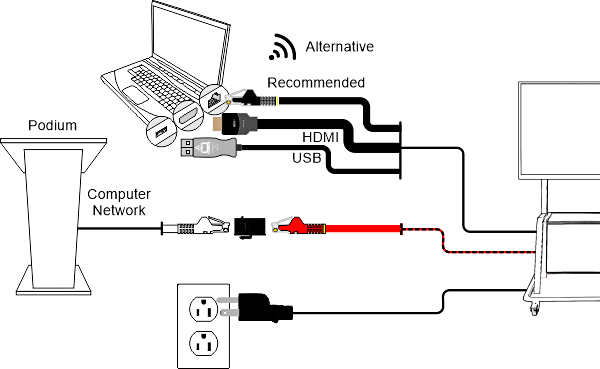
Computer network. Two options are available:
-
Connect the black Ethernet cable on the cart to the BYOD (recommended)
-
Use the Wi-Fi network
Turn on the Equipment
- Turn on the WCC as instructed on the cart
- Wait for the display and the Zoom Room controller to power up (2 minutes to boot and pair, then 37 seconds to synchronize with time server)
- If the display is not showing the Zoom Room welcome screen ensure that the display input is set to HDMI1
Connections to BYOD
Connect the black HDMI cable.
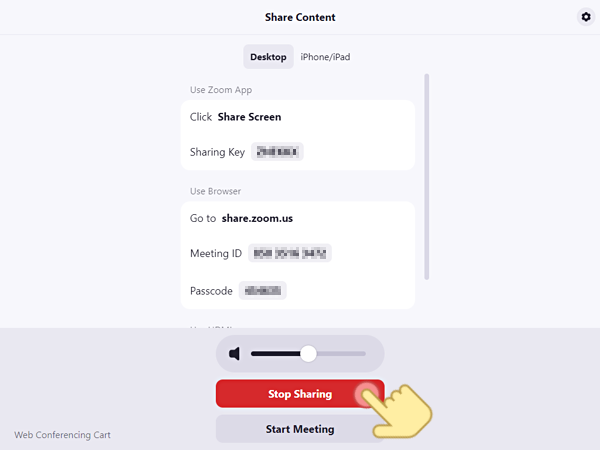
Wait for the controller to show the Share Content screen. Tap on Stop Sharing.
Connect the grey USB connector.
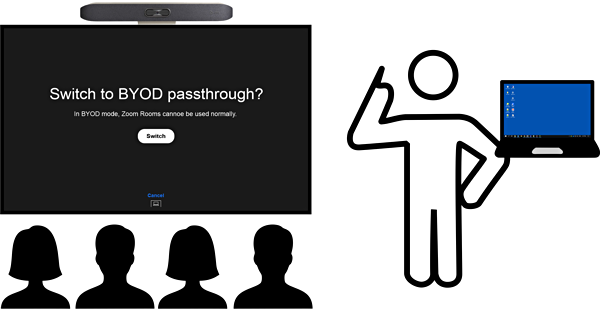
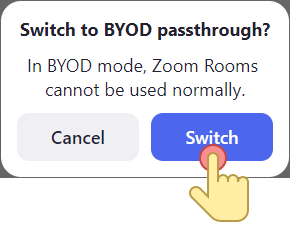
When the controller shows the screen to switch to BYOD passthrough, tap on Switch.
Joining a Zoom Meeting
- Remove the lens cover from the collaboration bar on top of the display
- Establish an internet connection from the BYOD
- Launch the application on the BYOD to host the online meeting
- In the meeting application, select the following devices:
- Microphone: Echo Cancelling Speakerphone (Poly Studio X50 Audio)
- Speaker: Echo Cancelling Speakerphone (Poly Studio X50 Audio)
- Video: Poly Studio X50 Video
Configure the Meeting Experience
The microphone, camera, and volume may be managed from the Zoom Room controller.
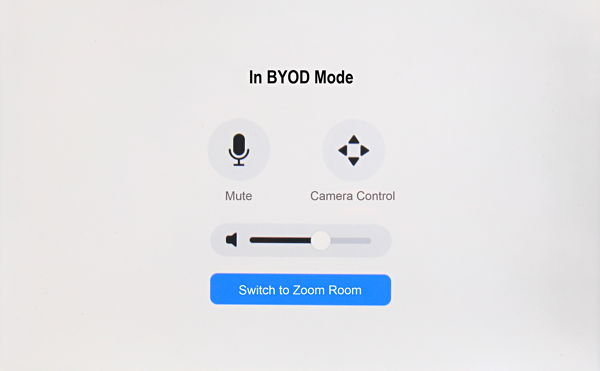
Camera Control
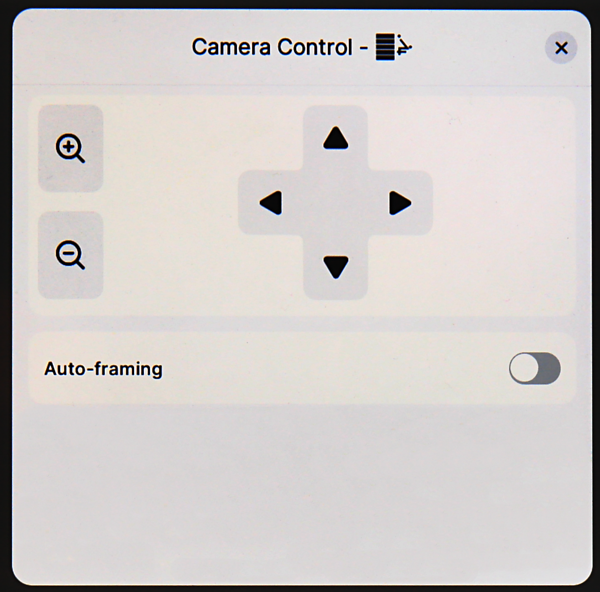
Fixed camera position: Use the loop and cursor controls to direct the camera at a fixed location and set the field of view.
Auto-framing: Enable this option if you wish the camera to track the active speaker(s) and frame them.
After the Meeting
- Place the lens cover back on the collaboration bar
- Turn off the WCC as instructed on the cart
- Disconnect all the cables previously connected
Troubleshooting
Having issues? See the troubleshooting page.
Graphics Attribution
Various icons on this page were sourced from Icons8.