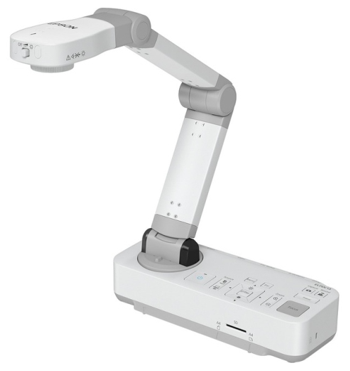
An Epson DC-13 document camera may be borrowed at the reception desk. Please contact admin.bme [at] mcgill.ca (subject: Epson%20DC-13%20Document%20Camera) for reservations or to check availability.
Specifications
- HD 1080p output resolution
- 16x digital zoom
- HDMI / VGA connectivity
- Microscope adapter supports many standard microscopes
- Record and share audio/video lessons — built-in microphone and included software; one-touch A/V recording
- Ultra smooth video performance — 30 frames per second (fps)
- Capture, save and present images — supports SD cards and computers
- Convenient Freeze and Capture buttons — easily pause and/or resume the image
- Image capture area: up to 29cm x 52cm (11.7" x 20.7")
Manuals*
*: The manuals depict VGA connections to the projector as the standard. The document camera was supplied with an HDMI cable and should be taken as the standard connection.
Included Items
- Remote control (ask for 2 AA batteries when borrowing the unit)
- Power cord and adapter
- HDMI cable - Male to Male
- USB cable - A-Male to B-Male
- Microscope adapter
- Carrying case
Usage Scenarios
In-Person Presentation
The simplest usage scenario is that of using the document camera for in-person meetings, where the device’s video output needs only to be viewed on a local display.
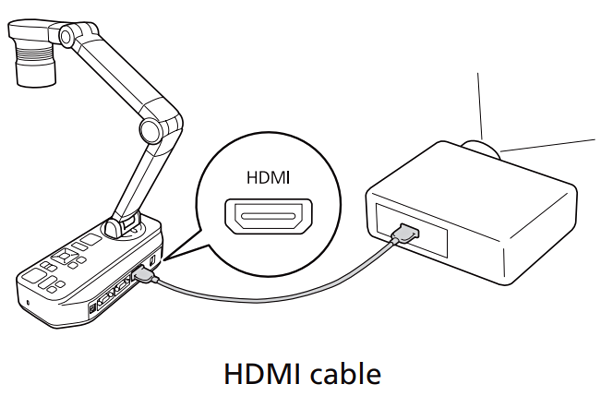
Connect an HDMI cable between the document camera output and the input of the local display unit (e.g., monitor or video projector).
Refer to the Quick Start or the User's Guide for more information on how to operate the document camera.
Zoom Presentation with Web Conferencing Cart
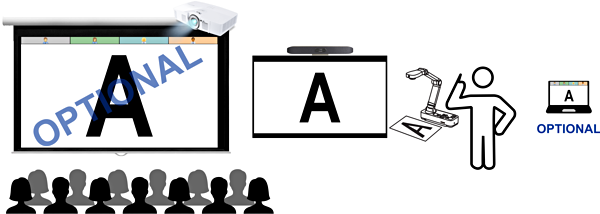
In this scenario, the document camera output is used as the video source in a Zoom meeting using the department’s Web Conferencing Cart (WCC). One may optionally replicate content shown on the WCC to an external display, such as a classroom projector.
Please familiarize yourself with the workings of the WCC if you have not done so already; the WCC: Zoom Presentation with Extended Display + Projector scenario is similar. The following instructions mainly detail how to connect the document camera to the WCC and how to share the document camera video in the Zoom meeting.
Setup
In this illustration, the WCC is a participant that has joined a Zoom meeting. The laptop represents the meeting host and may be optionally connected to the internet on premises. The connection to the projector is also optional and depends on the room / audience size.
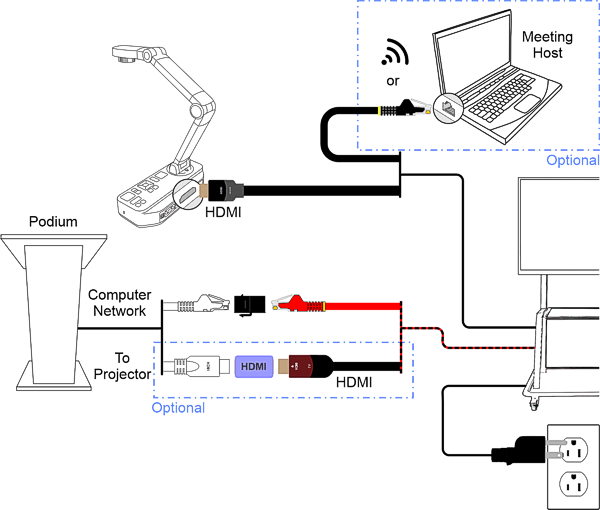
- Make the necessary connections as shown above (connect the HDMI cable to the document camera only when instructed)
- Turn on the WCC as instructed on the cart
- Turn on the document camera
- Ensure that the Zoom meeting host has started the meeting
- Join the meeting from the WCC controller
- Configure the meeting on from the WCC controller (microphone, camera, view)
- Ensure that the Zoom meeting host has enabled participants to share their screen
- Connect the HDMI cable to the document camera
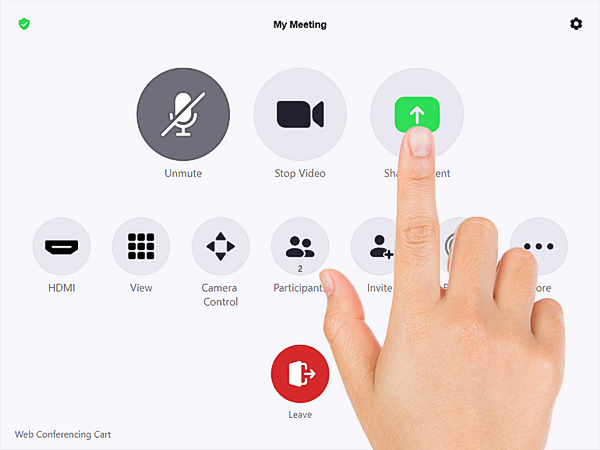
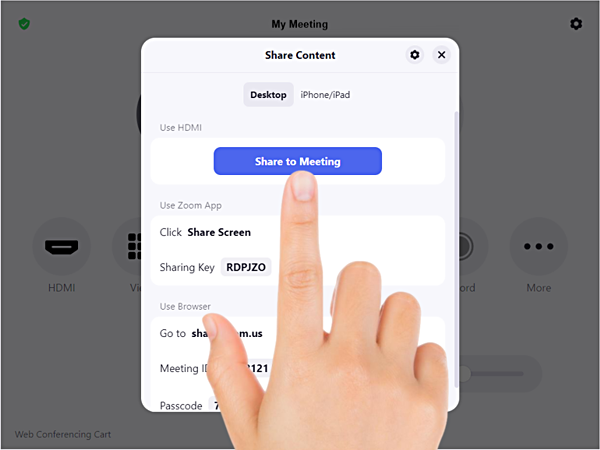
- If Share Content appears on the controller, share the document camera output as follows:
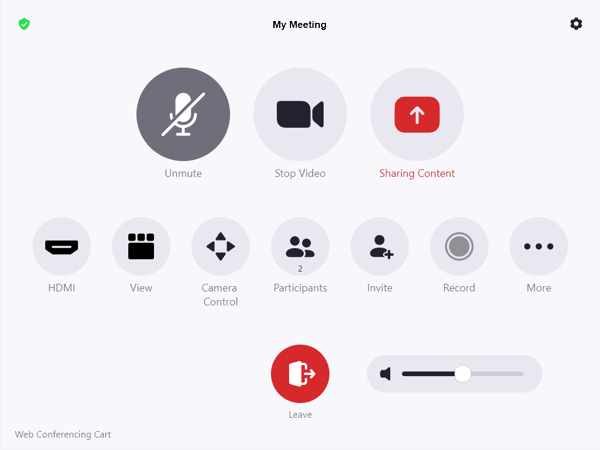
- Otherwise, content should already be shared and the controller should show:
Refer to the Quick Start or the User's Guide for more information on how to operate the document camera.
Graphics Attribution
Various icons on this page were sourced from Icons8.